Listen up, ladies and gals! If you're looking to dive into the world of henna art but don't want to get overwhelmed by those intricate designs, you've come to the right place. Simple mehndi design is where it's at if you're a beginner or just want something elegant yet effortless. In this article, we're going to break it down for you step by step so you can rock those hands with confidence. No need to stress about complicated patterns here, we're keeping it real and simple!
You know what's amazing about simple mehndi design? It’s versatile, stylish, and perfect for any occasion. Whether it's a casual weekend hangout or a formal event, these designs can elevate your look without stealing the spotlight. Plus, they're super easy to create even if you're not a professional artist. So, if you're ready to unleash your inner artist, let's get started!
Now, before we jump into the nitty-gritty, let me just say this – henna is more than just a design. It’s an art form that connects us to culture, tradition, and creativity. And with simple mehndi designs, you can express yourself without feeling intimidated. Stick around, because we’ve got some killer tips and tricks coming your way!
Read also:Yuka Saso The Rising Star In Golf Whorsquos Captivating The World
What Makes Simple Mehndi Design So Appealing?
Alright, let's talk about why everyone's falling head over heels for simple mehndi designs. First off, they're quick to apply, which is a game-changer when you're short on time. Secondly, they're beginner-friendly, meaning you don't have to be an expert to pull them off. Lastly, they’re incredibly chic and can complement any outfit effortlessly. Who wouldn’t want that, right?
Here’s the thing: Simple doesn’t mean boring. In fact, it’s all about making a statement with fewer elements. Think of it as minimalism in art – less is more. These designs focus on clean lines, basic shapes, and symmetry, which makes them visually appealing and easy on the eyes.
Why Choose Simple Over Intricate Designs?
Let’s be real for a second. Intricate mehndi designs are beautiful, but they can be overwhelming, especially if you're new to this. Simple mehndi designs, on the other hand, offer the perfect balance between elegance and ease. Here’s why you should consider them:
- They’re quick to apply and dry faster.
- You don’t need professional skills to create them.
- They’re less likely to smudge or fade quickly.
- Perfect for everyday wear or casual events.
Getting Started: Tools and Materials You’ll Need
Before you dive into creating your masterpiece, it’s important to gather the right tools. Here’s a quick list of what you’ll need:
- Henna cone or applicator – Make sure it’s fine-tipped for precision.
- High-quality henna paste – Look for organic and natural options.
- Cotton swabs – For cleaning up mistakes.
- Lemon juice and sugar – To seal the design and enhance color.
- A clean, dry workspace – Important for avoiding smudges.
Now that you’ve got your tools ready, let’s move on to the fun part – designing!
Top Simple Mehndi Design Ideas for Beginners
Here are some of our favorite simple mehndi design ideas that are perfect for beginners:
Read also:Hash Auctions The Gamechanging Mechanism You Need To Know About
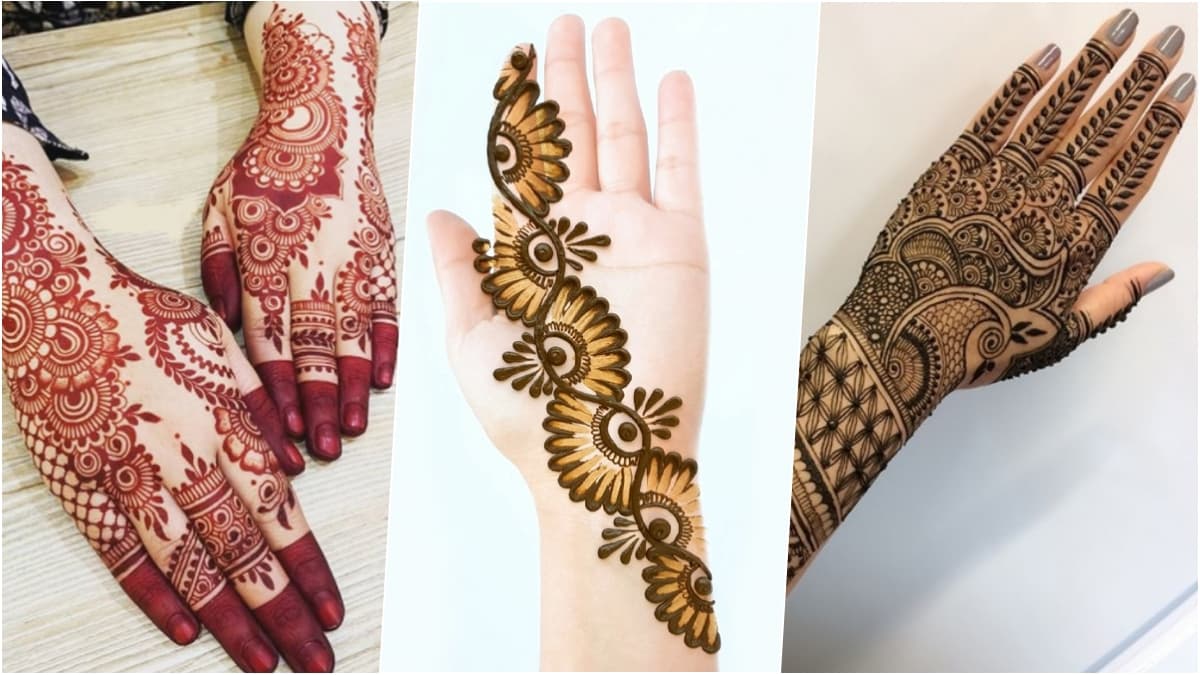
- Floral Patterns: Start with basic flowers and leaves. You can create them in a circular or linear pattern.
- Butterfly Design: A small butterfly on your palm or fingers is both cute and easy to do.
- Peacock Feather: A classic yet simple design that looks stunning on the back of your hand.
- Geometric Shapes: Use triangles, circles, and squares to create a modern look.
- Dot Art: Create patterns using small dots. It’s a fun and unique way to experiment with design.
Step-by-Step Guide to Creating Simple Mehndi Designs
Alright, here’s where the magic happens. Follow these steps to create your own simple mehndi design:
- Clean your hands thoroughly and make sure they’re completely dry.
- Decide on the design you want to create and sketch it lightly with a pencil if needed.
- Hold the henna cone like a pen and start outlining your design.
- Once the outline is done, fill in the gaps if necessary.
- Let the design dry for at least 3-4 hours before sealing it with lemon and sugar.
- Wrap your hand in tissue paper or a cloth to allow the henna to stain properly overnight.
Pro tip: The longer you leave the henna on, the darker the stain will be!
Common Mistakes to Avoid
Even the best artists make mistakes sometimes. Here are a few common ones to watch out for:
- Rushing the drying process – This can cause the design to smudge.
- Using low-quality henna – It won’t give you the vibrant color you’re looking for.
- Not sealing the design – This can lead to a lighter stain.
- Touching the design too soon – Patience is key when it comes to henna art.
How to Choose the Right Design for Your Occasion
Not all mehndi designs are created equal. Some work better for certain occasions than others. Here’s a quick guide to help you choose the right design:
For Casual Events
Go for small, delicate designs like flowers, dots, or geometric shapes. These are perfect for a laid-back vibe and won’t overpower your outfit.
For Formal Events
Opt for slightly more elaborate designs, but still keep it simple. A peacock feather or a mandala pattern can add just the right amount of elegance without going overboard.
For Everyday Wear
Think minimalistic. A small butterfly or a single flower on your hand is all you need to add a touch of charm to your daily look.
Health and Safety Tips for Using Henna
While henna is generally safe, it’s always good to be cautious. Here are a few tips to keep in mind:
- Do a patch test before applying henna to your entire hand.
- Make sure the henna paste is 100% natural and doesn’t contain harmful chemicals.
- Avoid black henna, as it can cause allergic reactions and skin damage.
- Keep the area clean and avoid water for at least 6-8 hours after application.
How Long Does Henna Last?
The longevity of your mehndi design depends on several factors, including the quality of the henna, how well you take care of it, and where it’s applied. On average, henna stains last anywhere from 1-3 weeks. To make it last longer, avoid harsh soaps and exfoliants on the area.
Where to Find Inspiration for Simple Mehndi Designs
Feeling stuck for ideas? Don’t worry, we’ve all been there. Here are some great places to find inspiration:
- Social media platforms like Instagram and Pinterest are goldmines for mehndi design ideas.
- YouTube tutorials can walk you through the process step-by-step.
- Check out traditional mehndi designs from different cultures for unique patterns.
- Experiment with your own ideas – sometimes the best designs come from your imagination.
Tips for Practicing Your Skills
Practice makes perfect, especially when it comes to mehndi art. Here are some tips to help you improve:
- Start by practicing on paper or a sketchbook.
- Use a fine-tip pen to mimic the henna cone.
- Experiment with different patterns and styles until you find your groove.
- Don’t be afraid to make mistakes – they’re all part of the learning process.
Conclusion: Embrace Your Inner Artist
And there you have it, folks! Simple mehndi design is not only a fun way to express yourself but also a great skill to have. Whether you’re a beginner or just looking for something easy to try, these designs are sure to impress. Remember, the key is to keep it simple, clean, and elegant.
So, what are you waiting for? Grab your henna cone and get started! Don’t forget to share your creations with us in the comments below. And if you found this article helpful, feel free to share it with your friends. Happy designing!
Table of Contents
- What Makes Simple Mehndi Design So Appealing?
- Getting Started: Tools and Materials You’ll Need
- Top Simple Mehndi Design Ideas for Beginners
- Step-by-Step Guide to Creating Simple Mehndi Designs
- Common Mistakes to Avoid
- How to Choose the Right Design for Your Occasion
- Health and Safety Tips for Using Henna
- Where to Find Inspiration for Simple Mehndi Designs
- Tips for Practicing Your Skills
- Conclusion: Embrace Your Inner Artist